This guide shows how to set the IPXO abuse contact as the Abuse POC for your resource in ARIN.
Step 1: Log in to Account Manager
Go to https://account.arin.net, enter your Username and Password and click Log In.
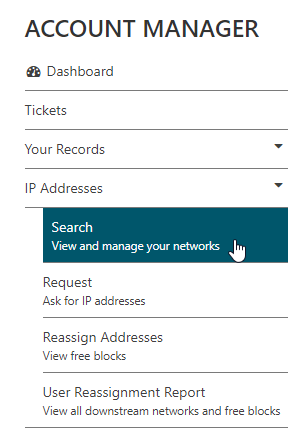
Step 2: Access the Search
In ARIN's Account Manager Dashboard, go to IP Addresses -> Search.
Step 3: Select the Net Handle
Click the Net Handle for which you want to change the abuse contact information.

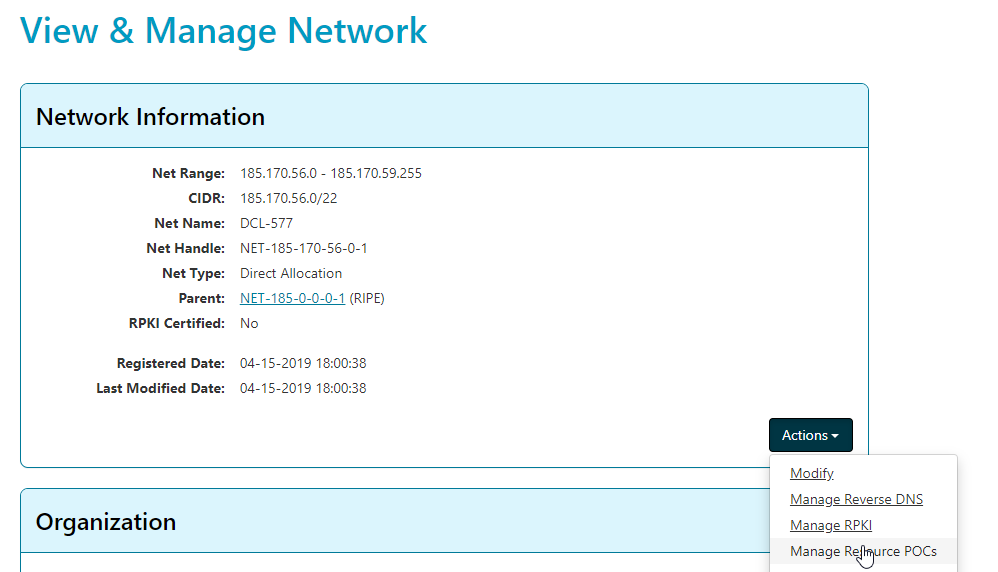
Step 4: Access the Manage Resources POC menu
In the Network Information menu, expand the Actions menu and click Manage Resources POCs.
Step 5: Submit an Abuse POC
Click Add Abuse POC and search for IUA-ARIN in the Handle field. Click Use this POC and then Submit.

Note: Please make sure that you are setting the Abuse POC handle. Adding an abuse email to a different handle (e.g., NOC) will not work.