Watch the video and follow the steps below to learn how to bring your leased subnet onto an Equinix Metal server.
Step 1: Assign your ASN
Assign your AS Number to the subnet that you have leased. Follow the How to Assign IPs to Your Infrastructure guide.

Note: Assign your ASN with Route object and ROA.

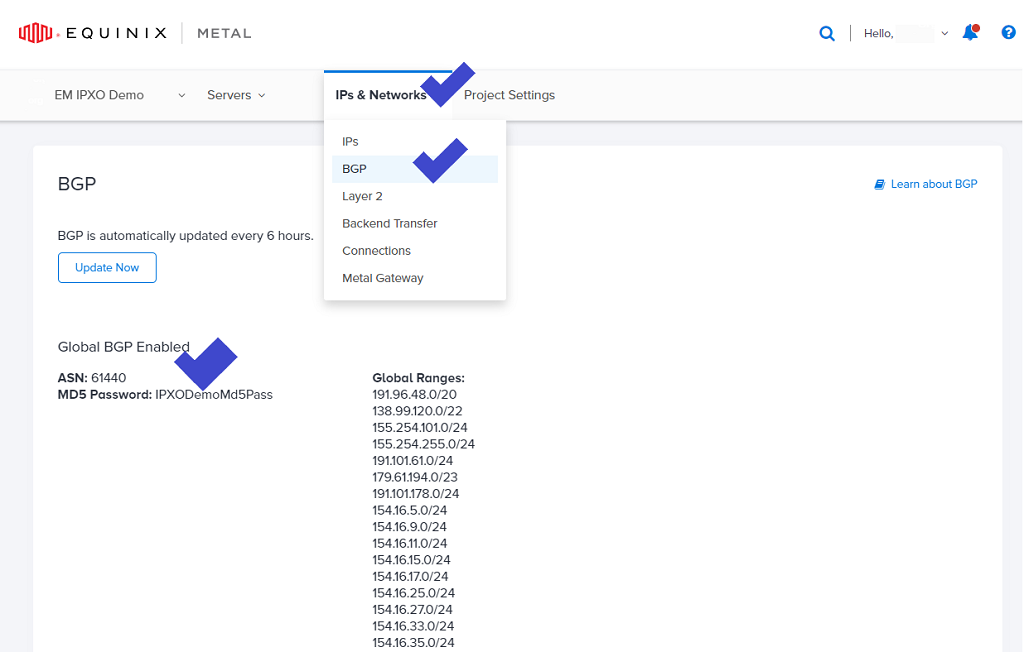
Step 2: Enable Global BGP
- Log in to your Equinix Metal Console.
- In the menu at the top, click IPs & Networks to expand a menu and select BGP. Then, click Active BGP on This Project and select Global BGP.
- Enter your ASN. Note that the Equinix Metal support team might contact you and ask to prove that you own or are allowed to use that ASN.
- Enter the MD5 password.
- Wait until the Global BGP is enabled by Equinix Metal.
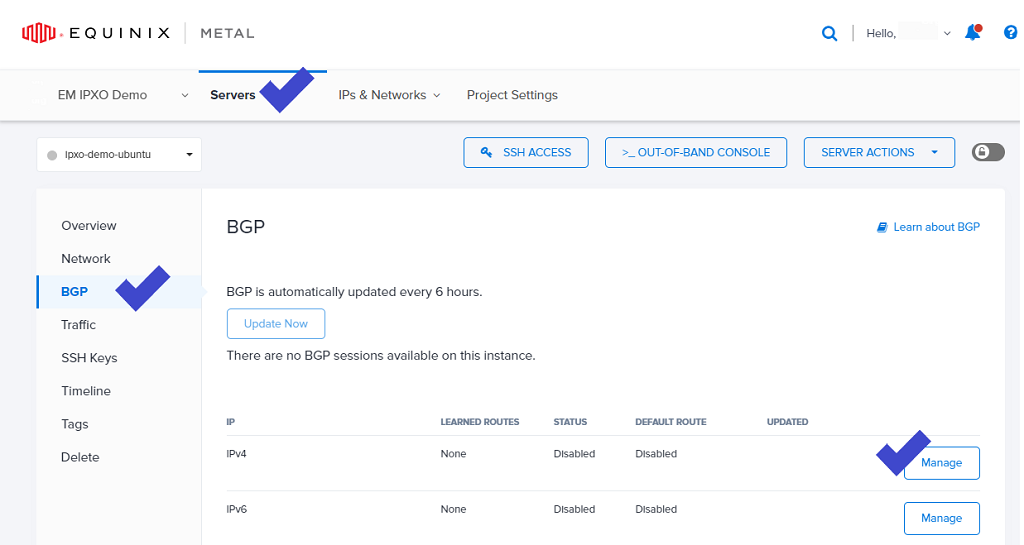
Step 3: Enable BGP on your Equinix Metal server
- In the Equinix Metal Console menu at the top, expand the Servers menu.
- Open your server and then click BGP in the menu on the left.
- Click Manage on the right of IPv4 and turn on Enable BGP.
Step 4: Configure BGP daemon on your server
Follow these Equinix Metal guides to learn how to route BGP with BIRD and FRR: