If you wish to add your APNIC allocated subnet to the IPXO Platform, you need to prepare it accordingly. Follow these instructions to learn how to do it.
Step 1: Check your subnet’s status
Use the Adding Subnets to IPXO From APNIC guide to find the list of statuses accepted in the IPXO Platform.
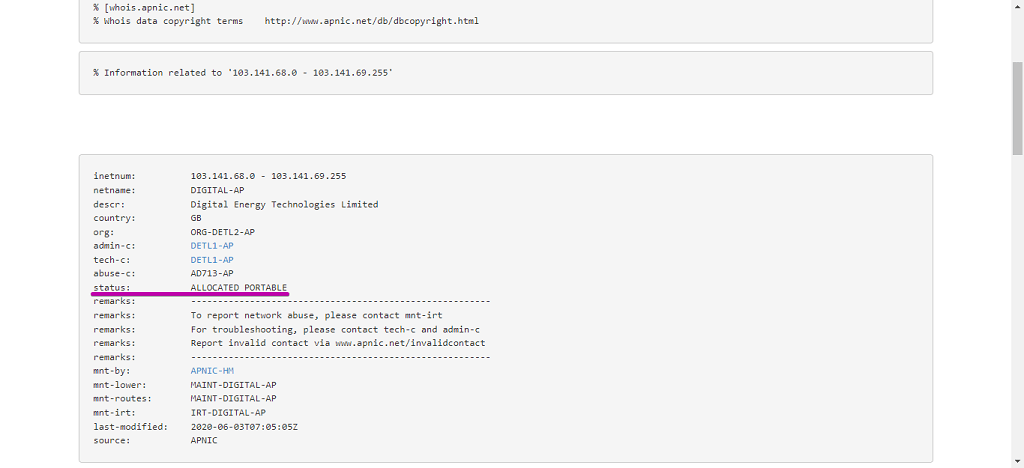
To find your subnet’s status, you can use the APNIC Whois Search service. Enter the subnet into the search field and click Search. To demonstrate, we use the subnet 103.141.68.0/23, which we received directly from APNIC.
Note: If you received your subnet from one of the NIRs, you should contact us via help.ipxo.com for further assistance.
Step 2: Create a more specific inetnum that will be added to the Platform
As demonstrated in Step 1, the subnet 103.141.68.0/23 has the Allocated Portable status. This means we need to create a more specific inetnum: 103.141.68.0/24 and 103.141.69.0/24.
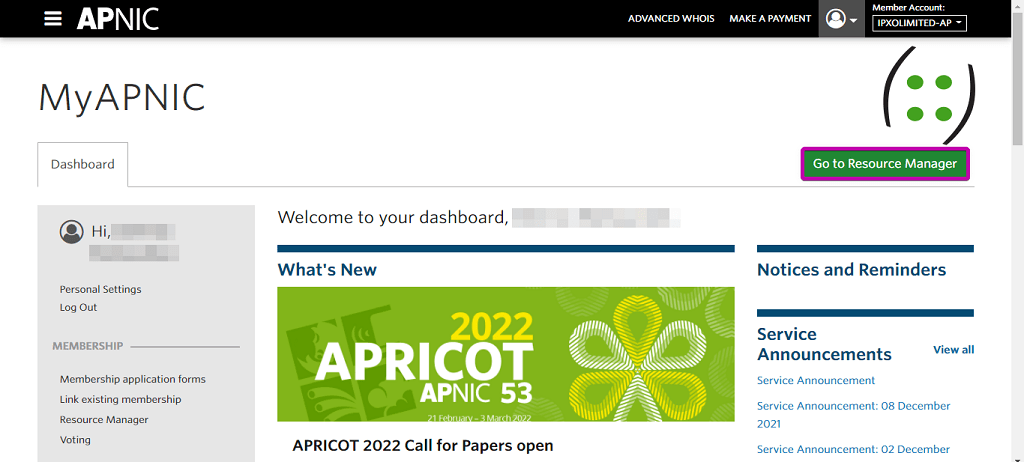
1. Log in to your MyApnic account and click Go to Resource Manager on the right.
2. Click the Resources tab at the top.
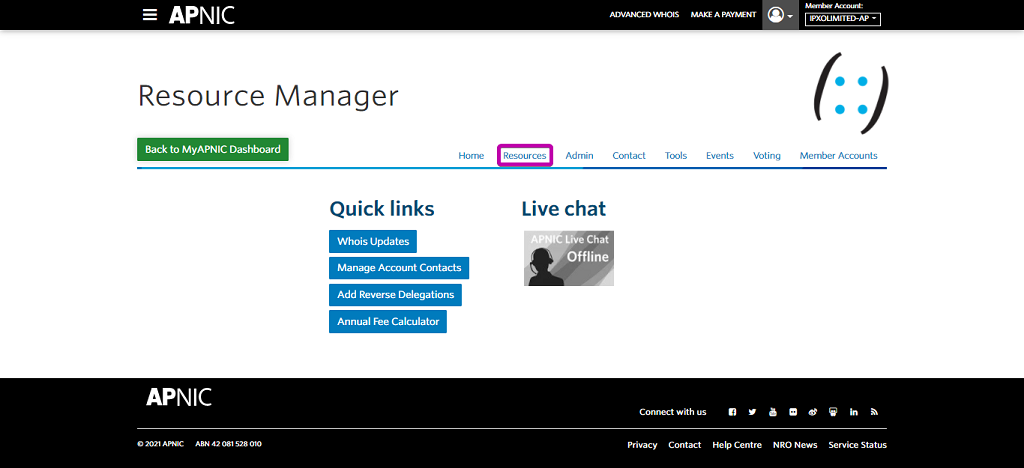
3. Then, click the Whois Updates menu shortcut on the right.

4. Click the Add tab at the top and select intetnum from the Object type menu.
Note: To demonstrate, we use IPv6 2405:9240::/33 (Object type: inet6num), but the concept and the requested fields for IPv4 (Object type: inetnum) are the same. Select inetnum for IPv4.
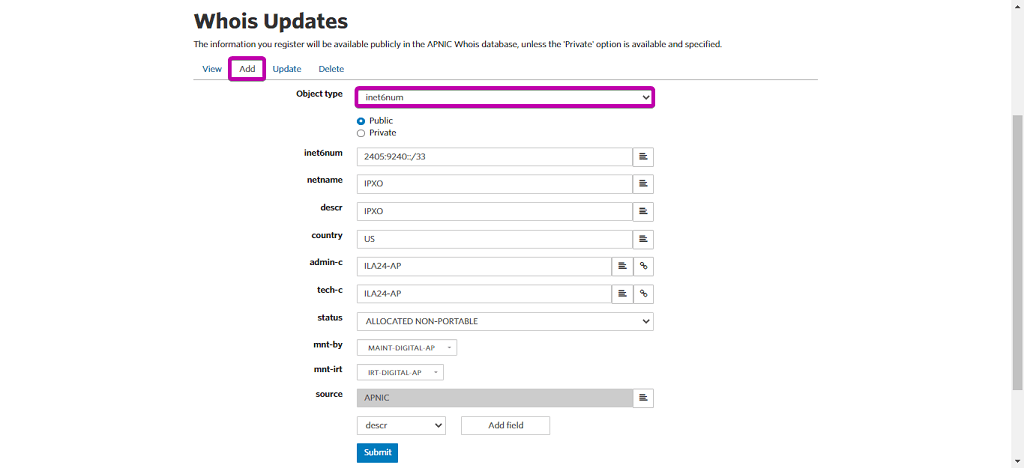
Example breakdown
| Inetnum type | Public |
| Inetnum | x.x.x.x/yy (subnet that will be added to the IPXO Platform) |
| Netname | IPXO (or your preferred one) |
| Descr | IPXO (or your preferred one) |
| Country | US (if you prefer, choose any location in Asia; e.g., JP, HK) |
| Admin-c | NU14-AP |
| Tech-c | NU14-AP |
| Status | ALLOCATED NON-PORTABLE (selected automatically) |
| Mnt-by | your maintainer (selected automatically) |
| Mnt-irt | your irt maintainer (selected automatically) |
5. Finally, click Submit to create a more specific inetnum.
Step 3: Create a maintainer for IPXO to manage your resource
1. If you are still in the Resource Manager menu, click Resources -> Whois Updates.
2. Click Add in the menu at the top and choose mntner in the Object type field.
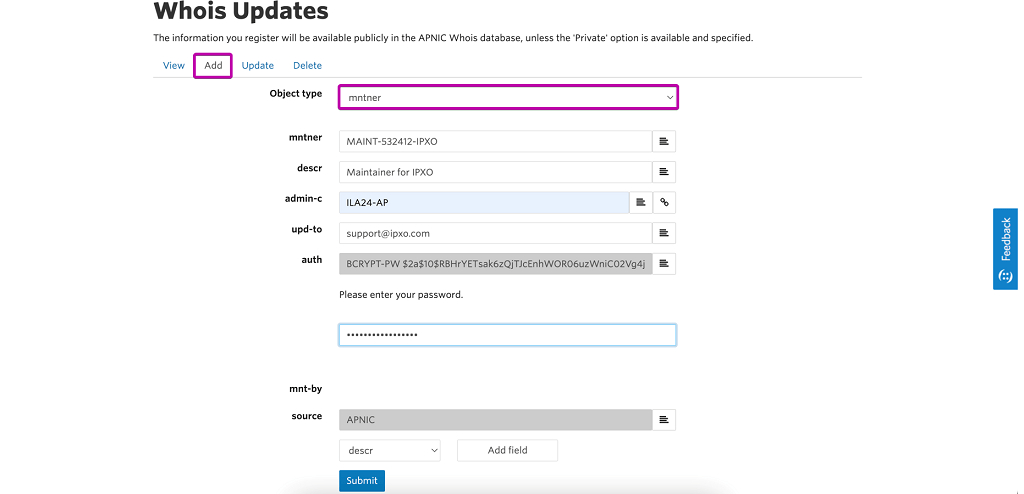
3. Once you provide all data (see example below), click Submit.
| Mntner | MAINT-532412-IPXO (replace 532412 with anything else, in format MAINT-<anything>-IPXO) |
| Descr | Maintainer for IPXO (or any other of your preference) |
| Tech-c | NU14-AP |
| Upd-to | support@help.ipxo.com |
| Auth | Will be filled automatically (once, you enter the password) |
Step 4: Update the inetnum with the created maintainer
1. If you are still in the Resource Manager menu, click Resources -> Whois Updates.
2. From here, click the Update tab and then select inetnum as the Object type. Type your freshly created inetnum and click Search.

3. Find the mnt-by field and select the previously created maintainer (format: MAINT-XXXXXX-IPXO). To demonstrate, we use MAINT-1217125-IPXO.
Note: To demonstrate, we use IPv6. Therefore, the following image shows inet6num chosen as the Object type instead of inetnum.

4. Once changed, click Update.
Step 5: Provide the maintainer created in step 3 to IPXO
1. Log in to your IPXO account and navigate to Monetization.
2. Type in your APNIC subnet you want to add to the Platform and click Next.

Note: To demonstrate, we use the subnet 103.141.68.0/24.
3. Click Set Up to configure your subnet.

4. Set up your subnet's split and reserve it if needed.
5. Provide your created maintainer's (from Step 3) ID and Password.

6. Follow on-screen instructions to complete the subnet setup.
Once the subnet is successfully added, it will be validated by IPXO systems to make sure everything is prepared correctly. Please make sure to check the progress of your subnet.