If you wish to add your AFRINIC allocated subnet to the IPXO Platform, you need to prepare it. Follow this guide to learn how to do it.
Step 1: Check your subnet's status
Go to https://afrinic.net/whois, enter your subnet into the Search query box and then click Search at the bottom. To demonstrate, we use 154.70.152.0/22 as an example.
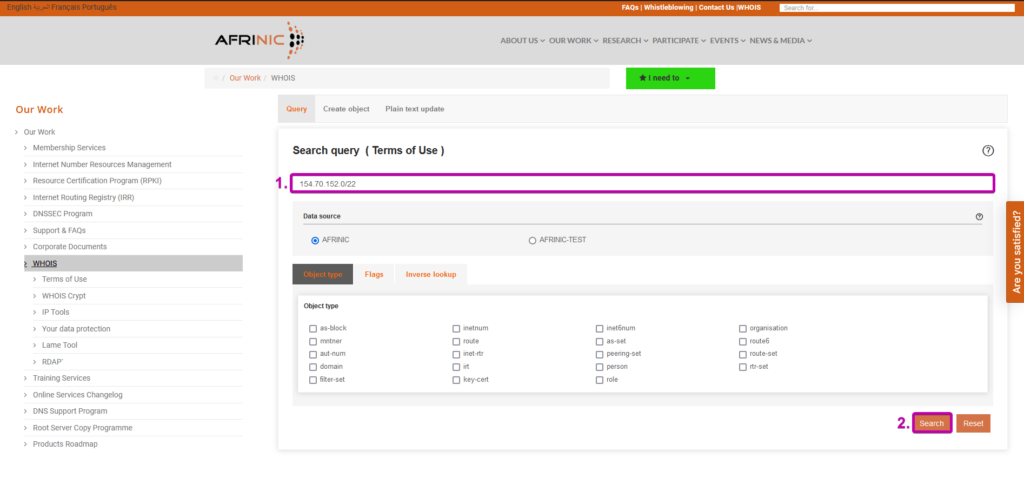
The image below shows an example of the results page. The field you need to check is Status.
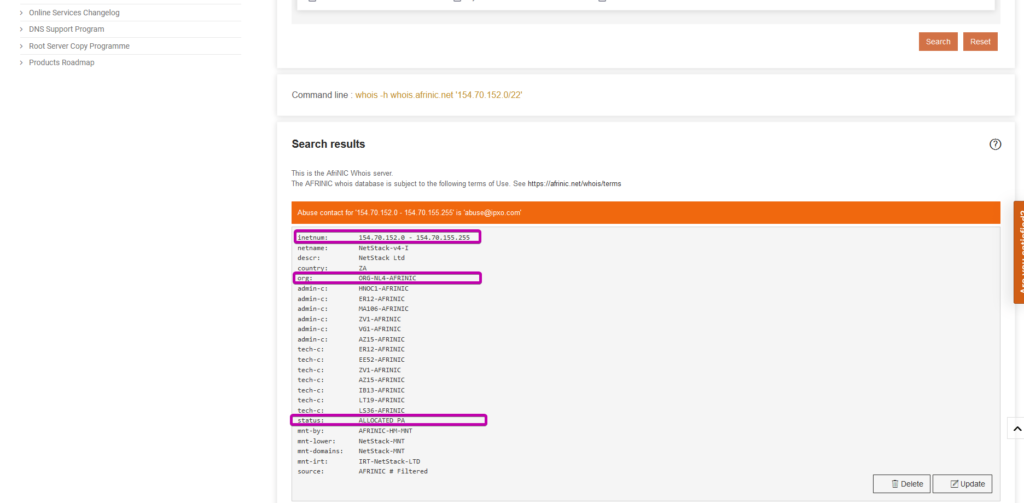
In our case, the status is Allocated PA, and the subnet is bigger than /24, which is accepted at IPXO. Use our guide to learn more about acceptable AFRINIC subnet statuses.
Step 2: Set your maintainer admin-c or tech-c abuse-mailbox
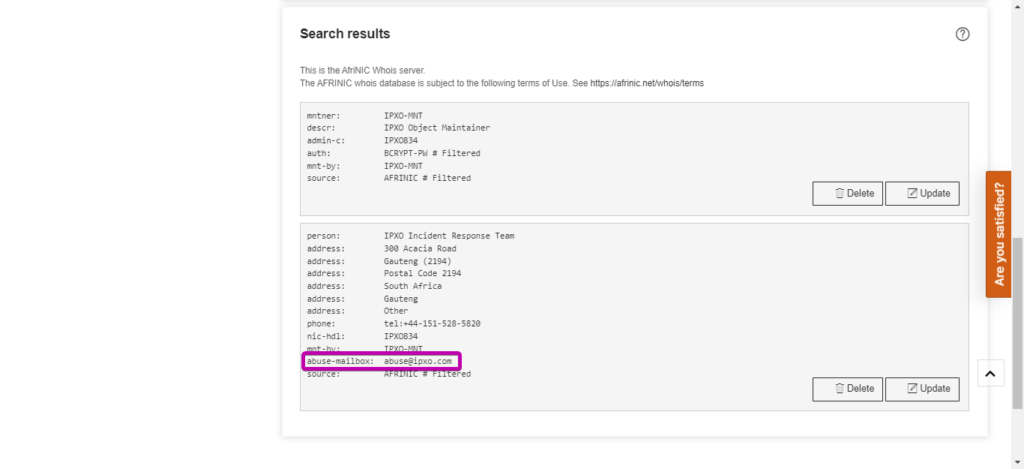
Once the subnet is added to the IPXO Platform, you need to confirm your subnet ownership. To confirm it, you receive an ownership verification email to your abuse contact mailbox provided in the admin-c or tech-c attributes. You can read more about this in our Subnet Ownership Confirmation and How to Add/Update the abuse-mailbox guides.
Step 3: Create inetnum if your subnet has Allocated PA status and is bigger than /24
Note: If you already have a subnet with the Assigned PA status, you can jump to Step 4. If you have a different subnet status, check the acceptable AFRINIC subnet statuses and follow the presented actions.
Go to https://afrinic.net/whois, click Create Object, select inetnum and then click Load.
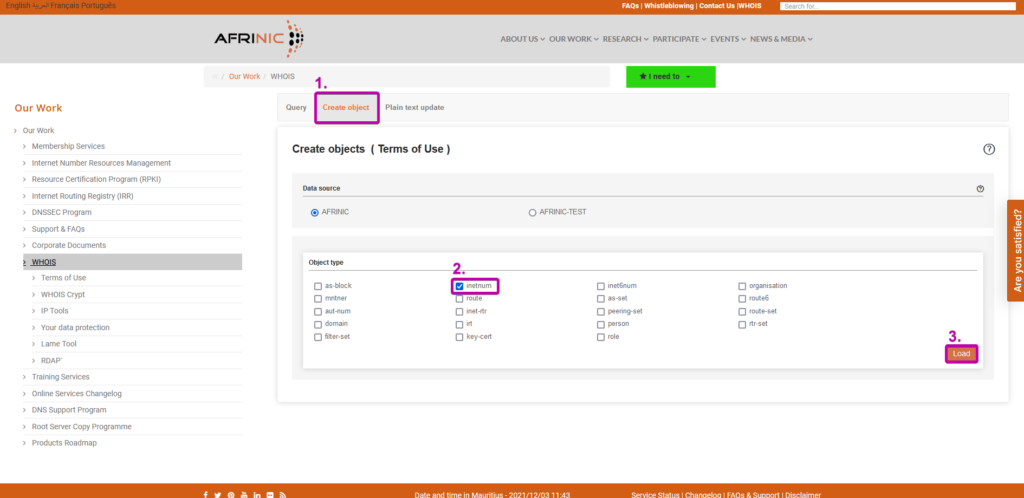
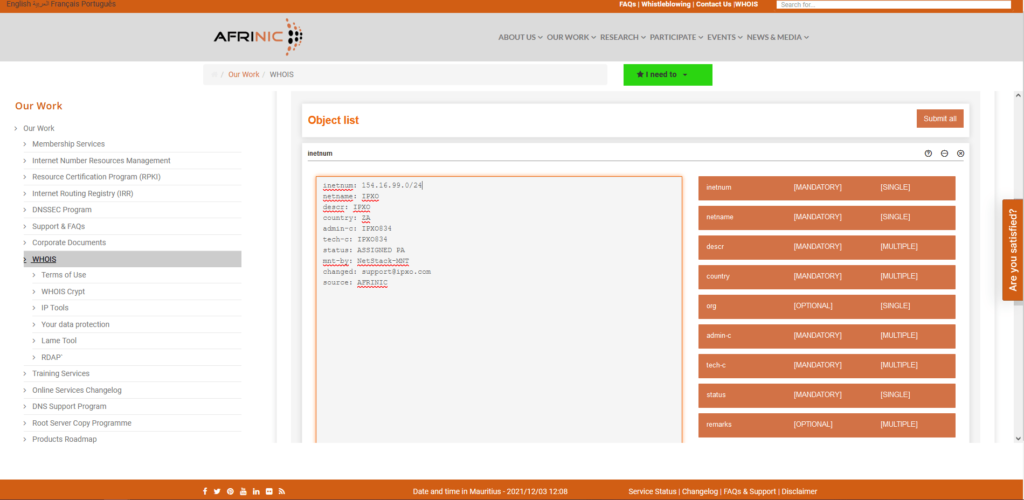
In the Object list window, you can create an inetnum. The template loads with the fields you need to fill and explanations on the right. Fill according to the requirements. In the <...> fields, provide your own data:
inetnum: <subnet that will be added to the IPXO platform, in format x.x.x.x/yy>
netname: IPXO
descr: IPXO
country: ZA
admin-c: AR834
tech-c: AR834
status: ASSIGNED PA
mnt-by: <your-maintainer>
changed: <your-email>
source: AFRINIC
To demonstrate, we use 154.16.99.0/24 as an example.
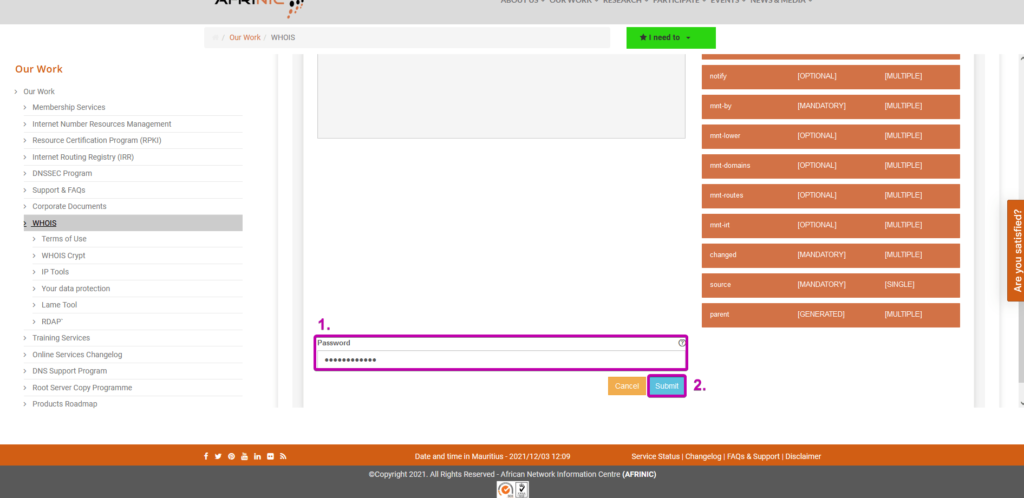
Once you provide the necessary information, scroll down to the Password section and enter your maintainer (XXXX-MNT) password. Click Submit.
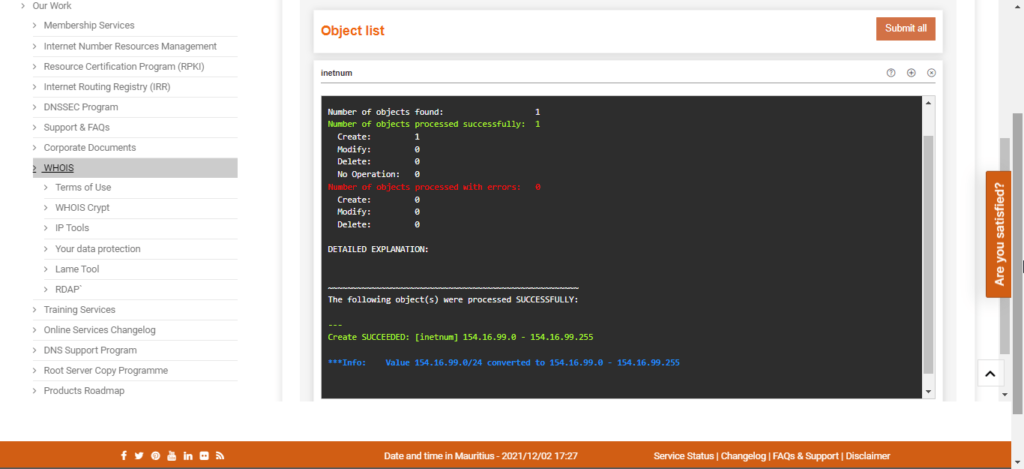
If the information is filled in correctly, you will see a message like the one represented in the image below.
Step 4: Add Netutils mnt-by
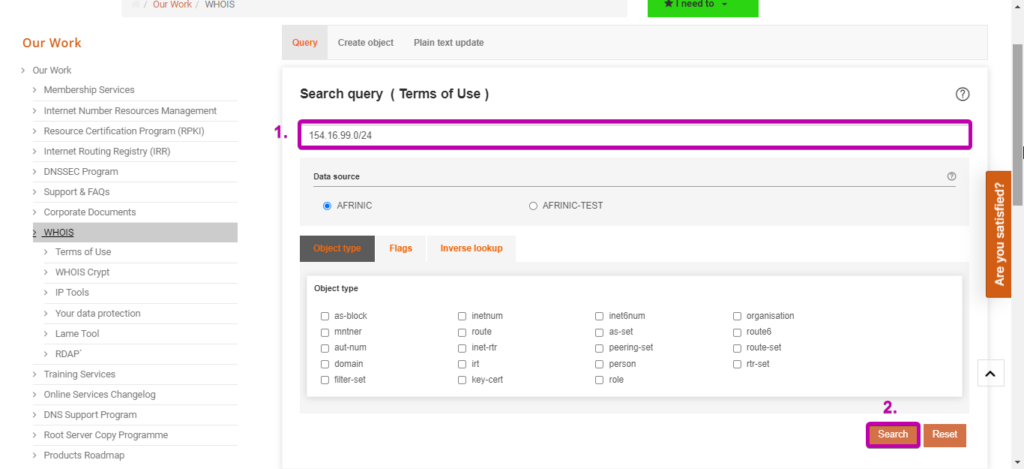
Go to https://afrinic.net/whois, enter the subnet you have just created (or one you already had with Assigned PA/Sub-Allocated PA status) into the Search query field and then click Search.
To demonstrate, we use 154.16.99.0/24 as an example.
Scroll down to find your subnet and then click Update.
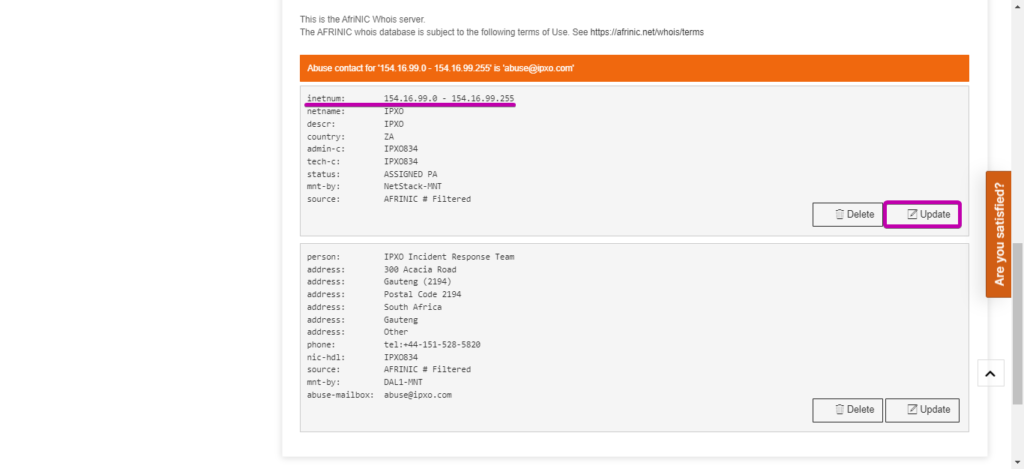
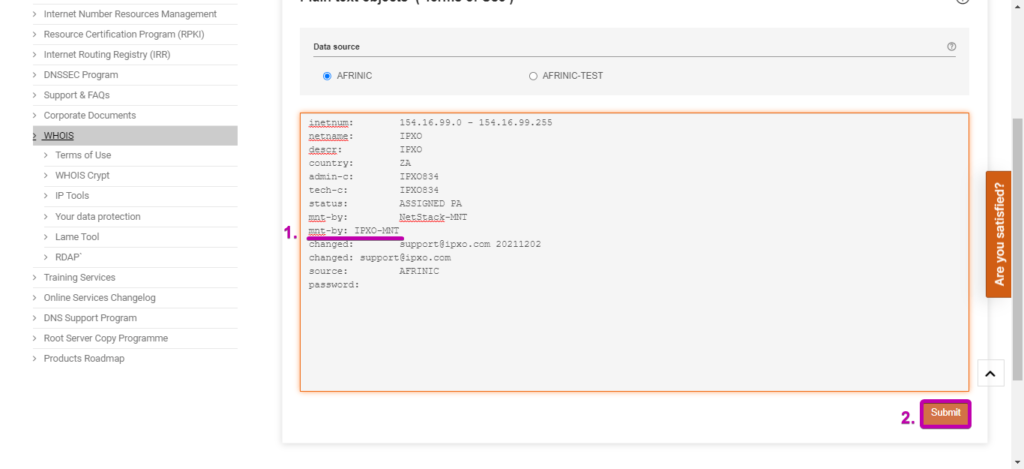
Find the mnt-by field, place the cursor at the end of the line and tap Enter on the keyboard to open a new line. Enter mnt-by: netutils-mnt just like in the template below. In the <...> fields, provide your own data:
inetnum: <subnet that will be added to the IPXO platform, in format x.x.x.x/yy>
netname: IPXO
descr:m IPXO
country: ZA
admin-c: AR834
tech-c: AR834
status: ASSIGNED PA
mnt-by: <your-maintainer>
mnt-by: netutils-mnt
changed: support@help.ipxo.com 20211202
changed: <your-email>
source: AFRINIC
password: <your-maintainer-password>
To demonstrate, we use 154.16.99.0/24 as an example.
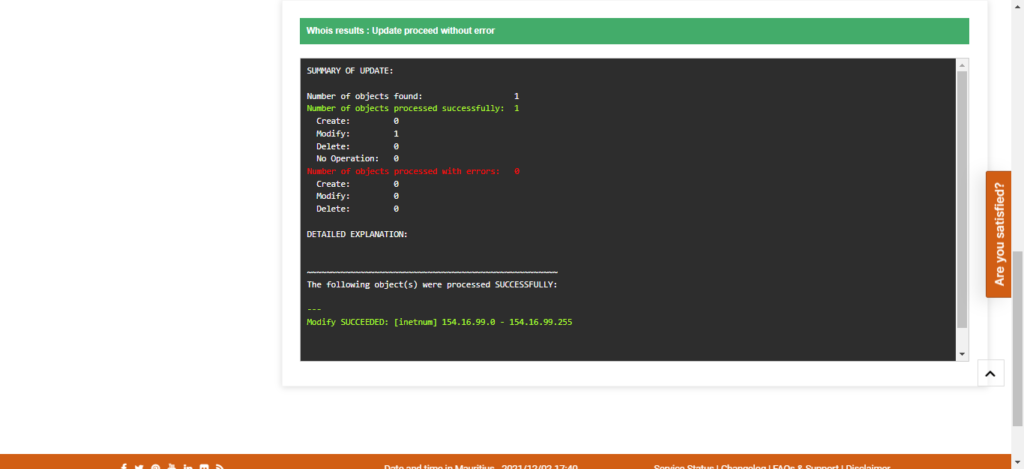
If the information is filled in correctly, you will see a message like the one represented in the image below.
Once you add Netutils as mnt-by, you can add the subnet to the IPXO Platform.
