Before you upload an ARIN allocated subnet to the IPXO Platform, you have to add an abuse point of contact (POC) to your organization's POC in ARIN.
Follow the instructions below to add a POC to an ARIN inetnum.
Prerequisites
If you want to upload ARIN allocated subnets to the IPXO Platform, you need to perform the following steps first:
- The network resource of the subnet added to the Platform must be reallocated to the organization with OrgID: IL-845.
- The organization that performs the reallocation to IL-845 must have an organization’s abuse POC set up (find instructions below).
- The network resource must be of exact NetRange (exact subnets must exist in Whois, not larger or smaller).
How to create your organization’s POC in ARIN
To set up the POC in the ARIN subnet inetnum, you must have the point of contact already created, or you must create a new one. Follow the instructions below to create a point of contact.
Step 1: Access the Point of Contact records (POCs) menu
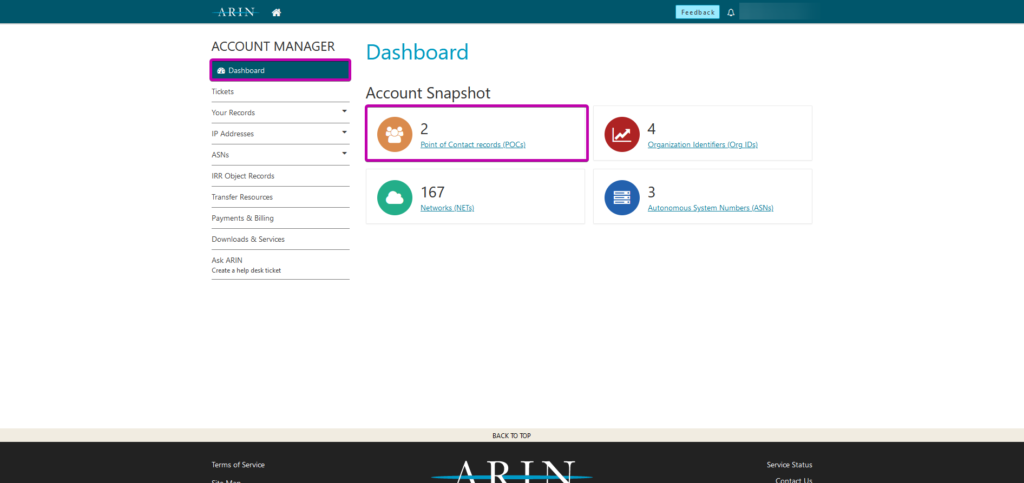
Log in to your ARIN Account Manager and click Dashboard in the menu on the left. In the Account Snapshot menu, click Point of Contact records (POCs).
Step 2: Click Create POC
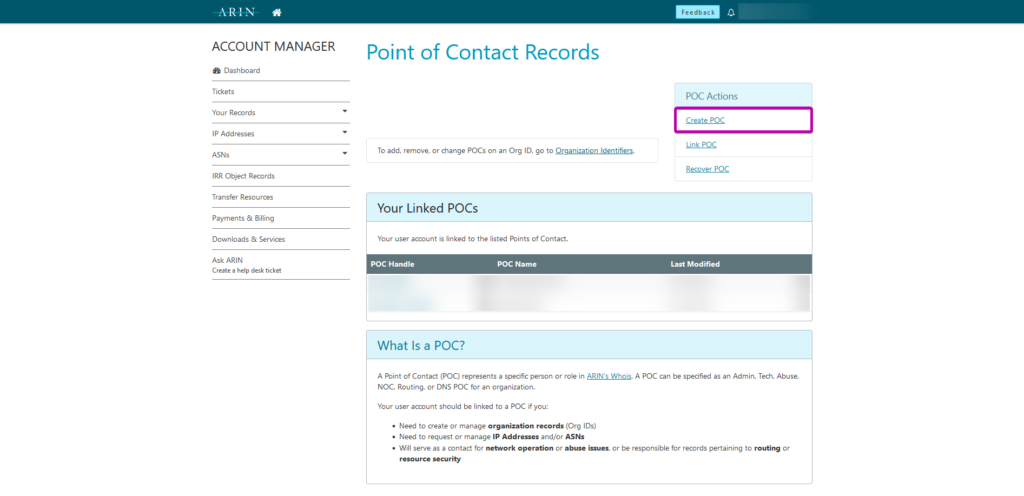
As you navigate to the Point of Contact Records menu, click Create POC in the POC Actions menu on the right.
Step 3: Create a POC Record
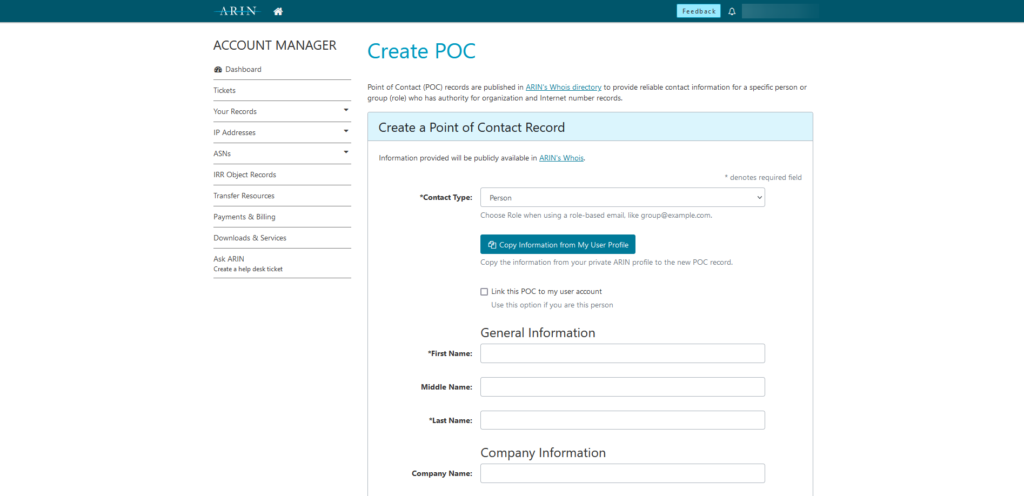
Provide the contact details in the Create a Point of Contact Record form and click Submit.
Note: You have different options when selecting the Contact Type. If this POC is related to a group email (e.g., it belongs to the Administrators group), you must select Role; otherwise, select Person.
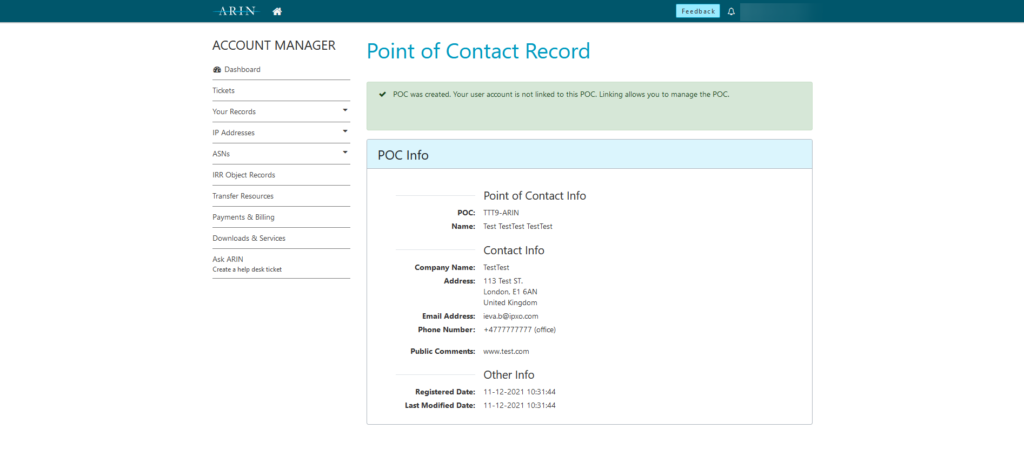
If you perform the steps correctly, you will receive a message indicating that a new POC was created.
You can also watch this official video from ARIN explaining how to create a POC.
Note: You need to add an abuse contact for your organization. This contact will be used to validate the ownership of the resource.
How to add your organization’s abuse POC in ARIN
If you want to add the abuse point of contact to an existing ARIN subnetwork, you should follow these instructions.
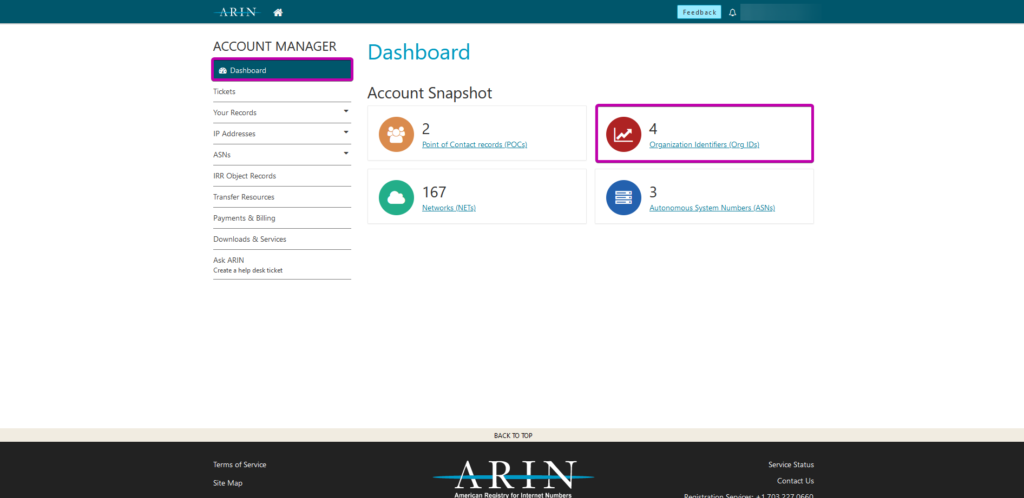
Step 1: Access the Organization Identifiers (Org IDs) menu
Log in to your ARIN Account Manager and click Dashboard in the menu on the left. In the Account Snapshot menu, click Organization Identifiers (Org IDs).
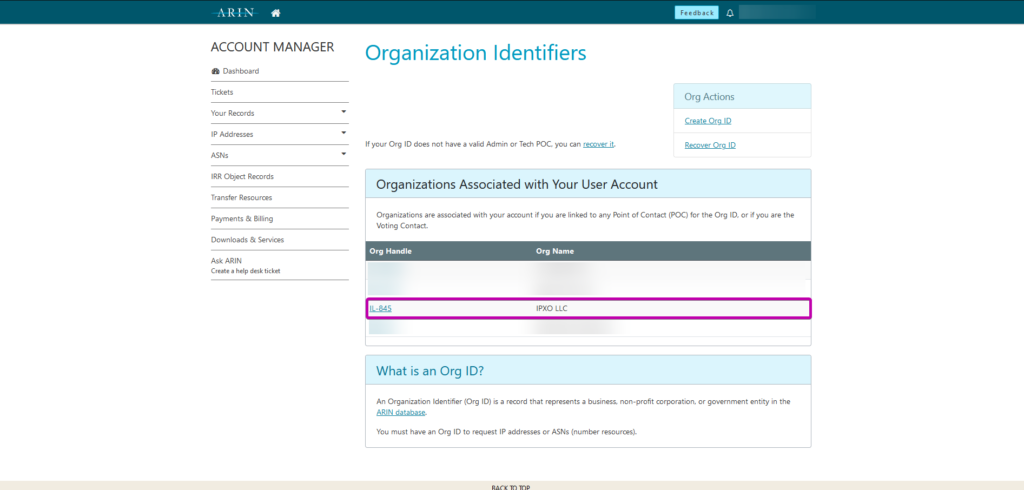
Step 2: Open the Org handle
In the Organization Identifiers menu, you can find a list of available Org Handles. Select the Org Handle that you want to assign the abuse POC to. In our example, we select the IPXO LLC Org Handle: IL-845.
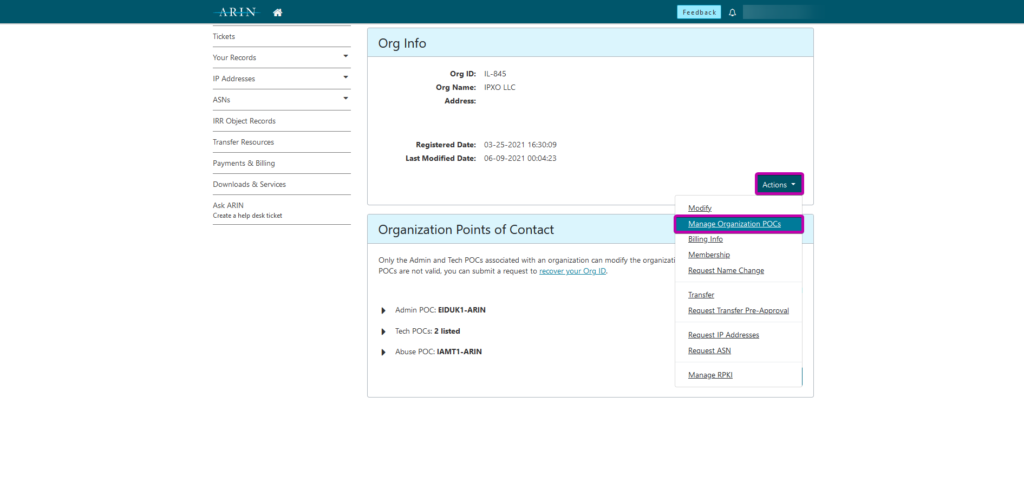
Step 3: Open the Manage Organizations POCs menu
Find the Actions button under Org Info, and click it to expand the options menu. Select Manage Organizations POCs.
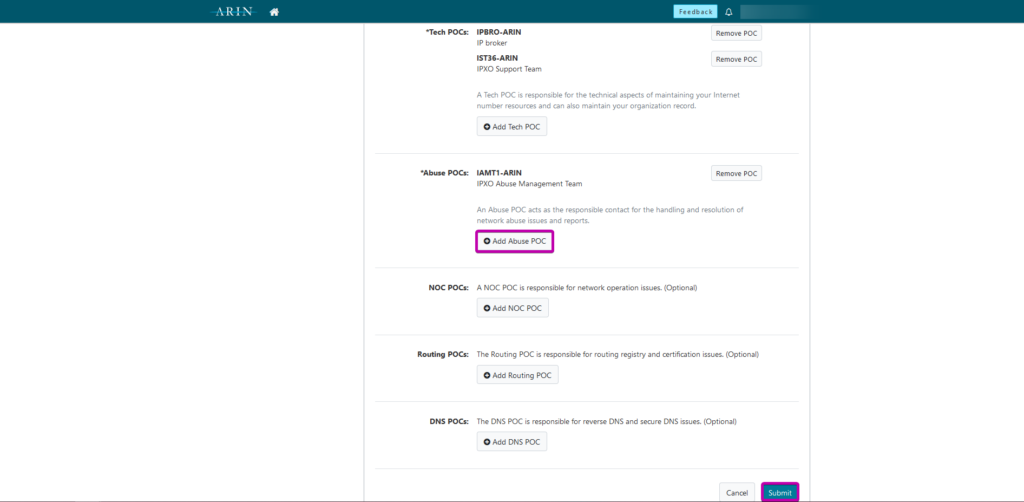
Step 4: Add your organization's abuse POC
Find the Abuse POCs section and click the Add Abuse POC button. Provide the contact details and click Submit.
If you have any questions, feel free to contact our Customer Support team via help.ipxo.com.
