If you wish to add your ARIN allocated subnet to the IPXO Marketplace, you need to prepare it accordingly. Follow these instructions to learn how to do it.
Step 1: Check your subnet's status
You need to check your subnet's WHOIS information to find the details about your subnet status. Use the Adding Subnets to IPXO From ARIN guide to find the list of statuses accepted in the IPXO Marketplace.
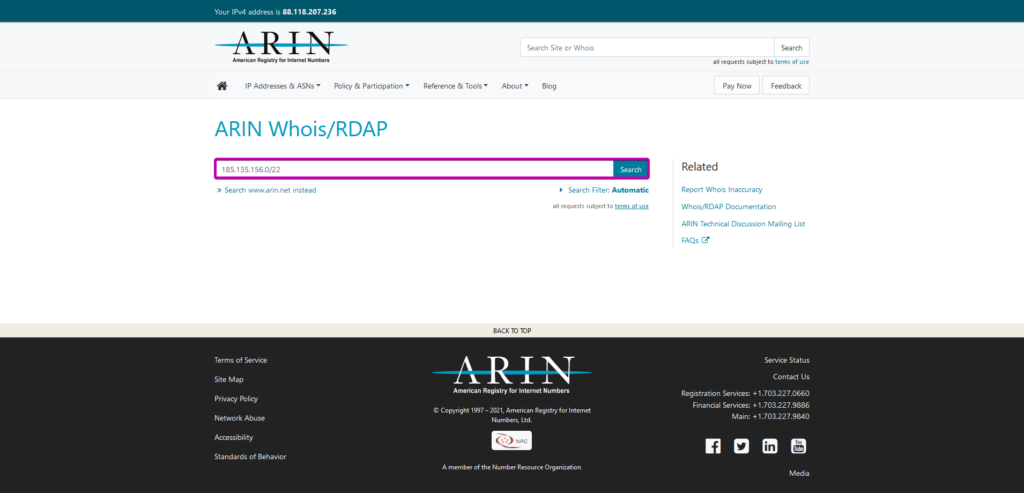
Log in to your ARIN Account Manager account and use the ARIN’s WHOIS/RDAP search engine. Enter the subnet into the search field and click Search on the right. To demonstrate, we use the subnet 185.135.156.0/22.
See the image below to see how the result should look like. The arrows point to the information necessary for placing the subnet in the Marketplace.
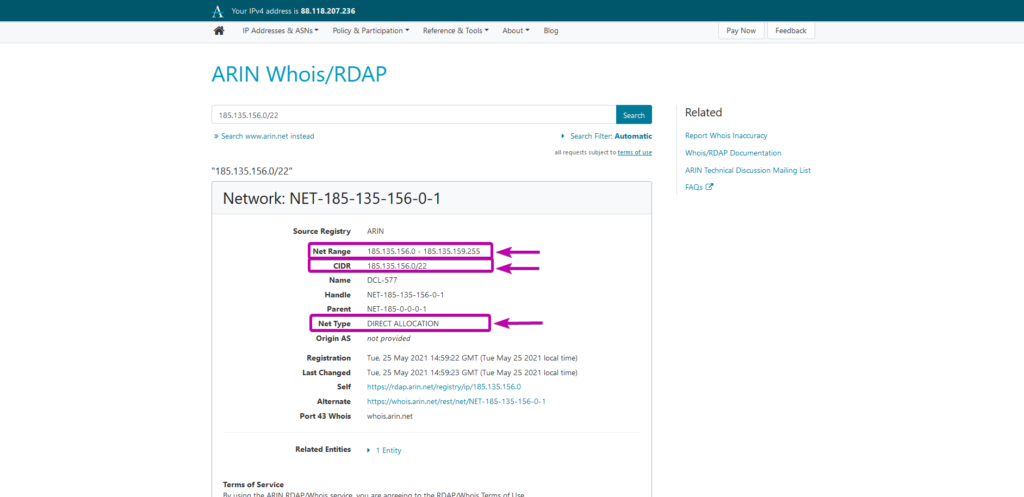
Note: A Net Type is an attribute that denotes the type of network resource that was allocated to an organization. Check the Net Type to see your subnet's status.
IPXO requires the Net Type to be Reallocated (to organization OrgID: IL-845). If it is DirectAllocation, you need to reallocate such networks (subnets) to organization OrgID: IL-845.
Step 2: Set Organization's Point of Contact (POC)
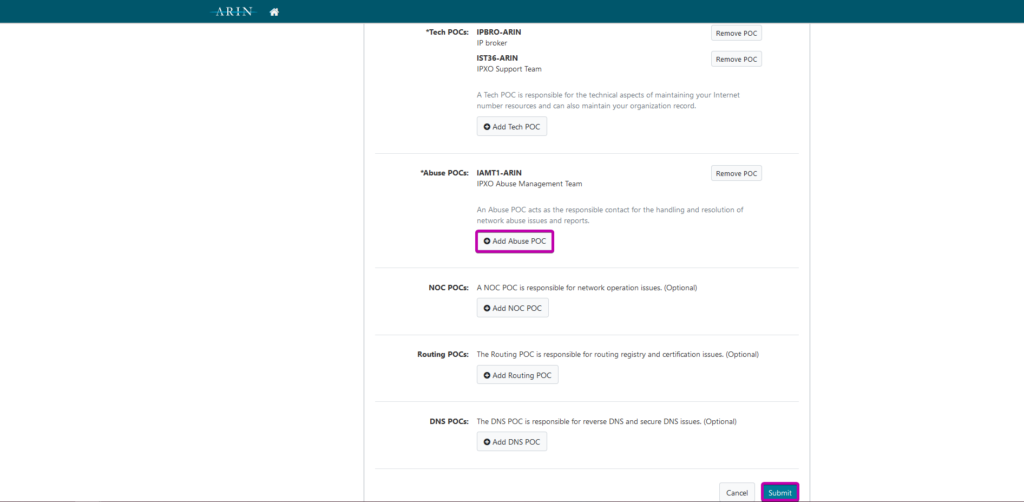
Setting the Abuse POC is mandatory, as you need it to receive an ownership email to verify the subnet.
You can read our guide on How To Add Your Organization’s Point of Contact (POC) In ARIN to set it correctly.
Step 3: Reallocate a network resource to IPXO
1. In the ARIN Dashboard on the left, go to IP Addresses -> Search.
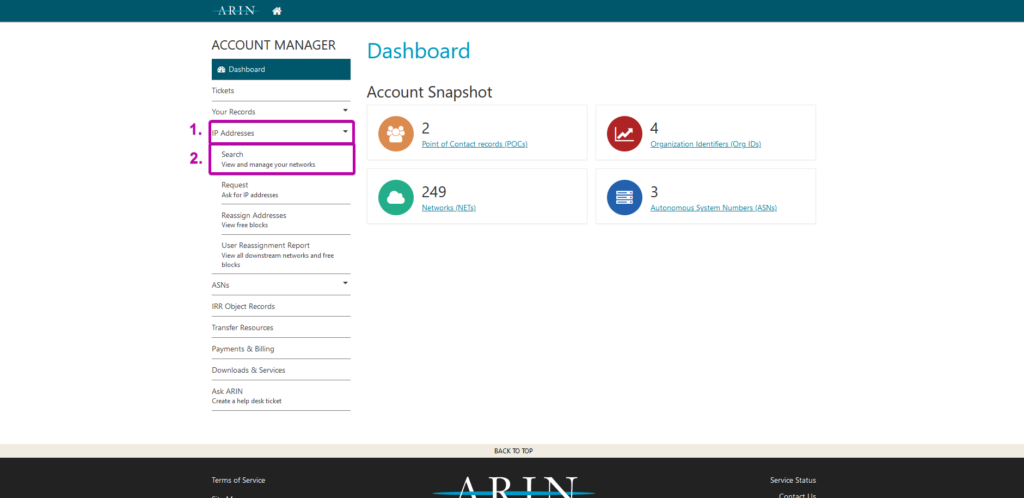
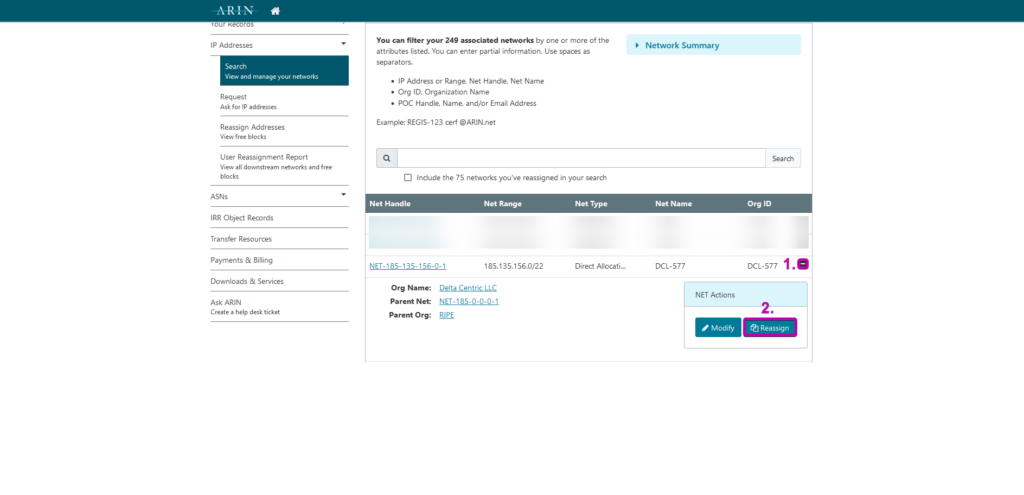
2. Find the resource you want to add to the Marketplace, click the + icon on the right to expand the NET Actions menu and then click the Reassign button. To demonstrate, we use the subnet 185.135.156.0/22.
3. Fill in the required information to create a reassignment, select Reallocation as the Network Type and then click Next Step.
Note: Here is how to create reassignment correctly:
- IP Address Range: In this field, enter the exact subnet that want to add to the Marketplace (it can be of the same size as the parent network resource that you are reassigning from)
- Network Type: Select Reallocation
- Network Name: Add the name of the reallocation to help distinguish it from the other ones; for example, the name IPXO-192-168-10-0-22 is associated with the subnet 192.168.10.0/22, but you can use any name you want
- Origin AS: You can leave this field empty or enter AS834

4. Enter IL-845 into the search field and click Search. Once the result for IPXO LLC comes up, click Use this Org and then click Next Step.

5. In the following step, you can provide Optional Info. Then click Next Step again.

6. In the final step, your can Review Reassignment. If everything looks how it should, click Submit.
Note: Make sure this information is correct:
- IP Address Range must represent the exact subnet you are adding to the IPXO Marketplace
- Network Type must be set to Reallocation
- Org ID must be set to IL-845

You can check the reallocation by searching the subnet you have just reallocated using ARIN's WHOIS-RWS search engine. The last entry should now show the reallocation you have just performed, and the one before it should show your network resource.
